 We’ve been playing with a 100-year-old recipe for German Coffee Cake and, because it was made with yeast, we just had to mess with the recipe until it became a lovely breakfast bread!

Wake up to cinnamon! Because cinnamon is a starring attraction in this lovely little breakfast bread, I’m thinking its nice to punch up that flavor by pulverizing some nice Vietnamese cinnamon bark chips to a fine powder with a blast in a mini grinder and a good mortar and pestle. Surprisingly, this only takes a few minutes. This is absolutely not necessary. Just that, since we’re makin’ this thing from scratch, I thought we may as well ante it up for an amazing hit of cinnamon. And it makes the kitchen, no, the whole dang house, smell heavenly! It starts with a grinder/blender device to pulverize the cinnamon bark chips.

And then you just use a heavy unglazed mortar and pestle (with a nice little weight to it) to turn the ground chips into a wonderfully fine powder. Can you smell the aroma yet?

Sister site with a cousin cake: You may also enjoy our cake post on how to create a simple yeasted German Coffee Cake. Like, when’s the last time you made a cake (well, a breakfast cake) with yeast instead of baking powder or the like? ha! Check out our little homegrown video.
SLOW FOOD WARNING! Actual prep time takes about 12 minutes once you have your ingredients assembled and then it will be 2 one-hour rises, though it may take longer, even an extra hour longer, depending on your yeast and flour and “growing environment”. I know you’re busy so be sure to set aside plenty of time on your first adventure to let your dough rise up and shine. Remember, flour and water and active yeast will rise given enough time, so if it doesn’t rise as fast as you’d expect, give it more time to grow — it will.

Make it a double-double! You may even want to make 2 loaves — one for you and your peeps and one for a kitchen giving gift made with love. This is my girlfriend’s stereoscope. Like who has a stereoscope card with a springer spaniel wearing a bonnet? (I guess it helps if you own the awesome Sherman Oaks Antique Mall.) If you do decide to double this recipe, I recommend preparing each batch of dough separately. You know, that ole’ divide and conquer theory.

What are your favorite bread baking gadgets? I get so many questions about my favorite baking tools and supplies. Like the cherry pitter for our homemade maraschino cherries — that is a lifesaver! So these are my current favorite bread making tools. None of them are necessary, which is why I didn’t include them in the list of required tools for this recipe (though I hope you have, or can get your hands on, the last one). And I hope you can share your favorite bread making tools with us in the Comments.
Level it up! This is how I level cups of loosely measured flour or sugar. A plastic straw (or a chop stick) works perfectly as a great leveling tool.

Super sharp and small! Although I’m hooked on the absolute quality and longevity of Cutco knives, they’re expensive and there are lots of interesting and inventive knives on the market today. Here’s my butter measuring tool. Ho! (It’s also my strawberry cutting knife and my broccoli cutter). 🙂 These inexpensive knives are super sharp and come with a case for inserting the knife blade. I think the knife gets sharpened each time you put it back into its case. And I like the variety of bright colors.

Safe and stable does it! Okay, here’s a great tool that I never knew I needed until I tried it. My nephew gave it to me for Christmas (thank you, John!). It’s a silicone bowl rim that holds different sized bowls absolutely stable on the countertop. It keeps me from chasing a large bowl around the counter. Although it could be my imagination, I swear that once your bowl is firmly rooted to the counter, you feel more confident about the whole shebang.

Long, sharp and serrated! A proper bread knife doesn’t have to be expensive to work well. The goal is to cut through the bread without ripping or tearing it — so a sharp and serrated knife is important and it must be long enough to completely cover the width of the bread (and then some) so that you can achieve an uninterrupted sawing motion.

Quick draw, fast read! My indispensable bread baking tool is a quick-read, flip-open baking thermometer. Just flip it open, poke and read it. I don’t usually use it to check the temperature of the dough at the end of kneading (though I know many who do) but I thought I’d show you how it works with the photo below. However, the temperature of the final baked bread turns out to be quite important because a baked loaf of bread can be dangerously deceptive. In fact, I don’t even know how to ensure a properly baked bread without such a tool. I have a collection of different baking thermometers but their probes are usually quite thick (and mar the beauty of the bread or cake). And most are way too slow to be effective. I wish this one had a lighted display to see the temperature in a dark oven, but it’s small, handy, fast and inexpensive. I haven’t figured out how to rely on a laser-type device yet so if you have a great one to recommend, do share in the Comments.

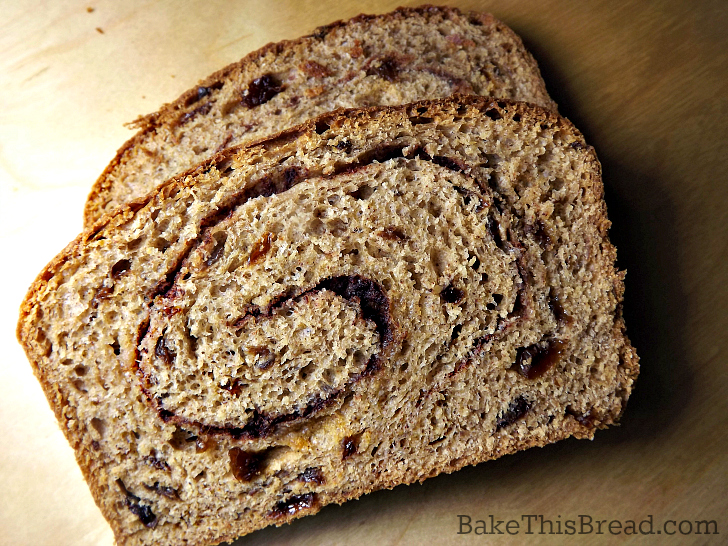
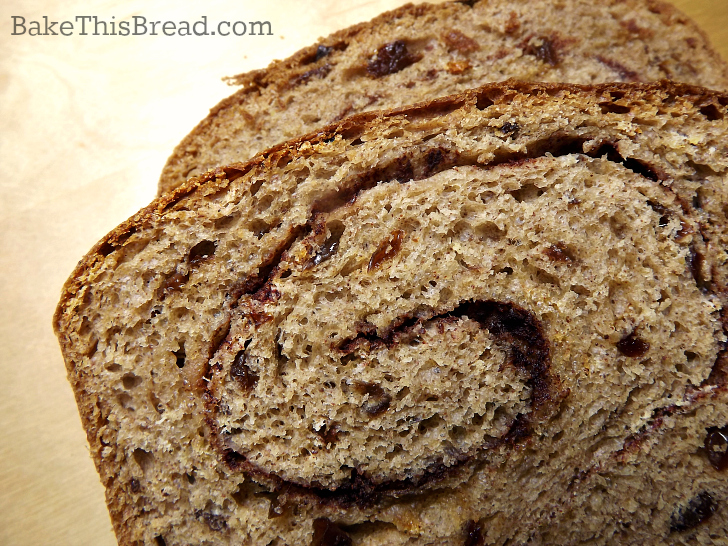
Look how many times I had to test this cinnamon swirl bread in 5 minute increments past 30 minutes to get the internal temperature to 185! ha! Can you see the probe marks? You can see that I like to check for doneness on the side inserted towards the center so the top of the bread is not spoiled with holes.

Summary of the steps to making a fabulous cinnamon swirl bread:
We’ll start (that’s me and you) by greasing the bottom of the pan, proofing the yeast and chopping some raisins and nuts. Then we’ll mix all ingredients in a big bowl except the raisins and nuts and stir until the flour is mostly incorporated then we’ll fold in the raisins and nuts by hand with a 30-second finger kneading. We’ll set the timer for 8 minutes and give the dough a firm kneading on the countertop, place it in a clean, buttered bowl, cover it with a towel and let it rise for an hour. Then we’ll roll it out (or press it out ’cause it’s really soft and easy to spread), smear it with butter, cinnamon and sugar, roll it up, place it in the baking pan and let it rise for another hour or more until the dough reaches the top of the pan. Next we’ll pre-heat the oven and bake it for about 40 to 50 minutes (maybe tenting it to keep the crust from getting too dark). When it’s hot from the oven, we’ll spread a little butter on top to protect the crust and remove it immediately from the pan to let it cool uncovered for about 15 minutes before slicing with a sharp serrated knife. Then we’ll toast it, butter it and serve that puppy up. Oh yeah!
Tools for Homemade Cinnamon Breakfast Bread:
9″ bread pan
1 large bowl for mixing all ingredients
1 small bowl or cup (for mixing yeast)
Large flat-blade knife (for chopping raisins and nuts to a smaller size)
Danish bread whisk or wooden spoon (for initial mixing of dough)
Cooking spray or unsalted butter (for smearing the bottom-only of the bread pan)
Measuring cups and spoons
Timer (your smart phone works well, for timing the kneading and baking)
Your hands and a little muscle power (for kneading the dough for 8 minutes)
Rolling pin (or bottom of a cookie pan or cake pan to flatten the soft dough)
Pastry brush (for spreading soft butter on rolled dough and to soften top crust after baking)
Dough scraper tool (to help roll up the swirled dough)
Aluminum foil or parchment paper tent (to loosely cover baking bread after 30 minutes if needed to prevent crust from over darkening)
Optional but highly recommended: Temperature tool
Optional but highly recommended: Long, sharp, serrated knife (aka bread knife) for a perfect slice

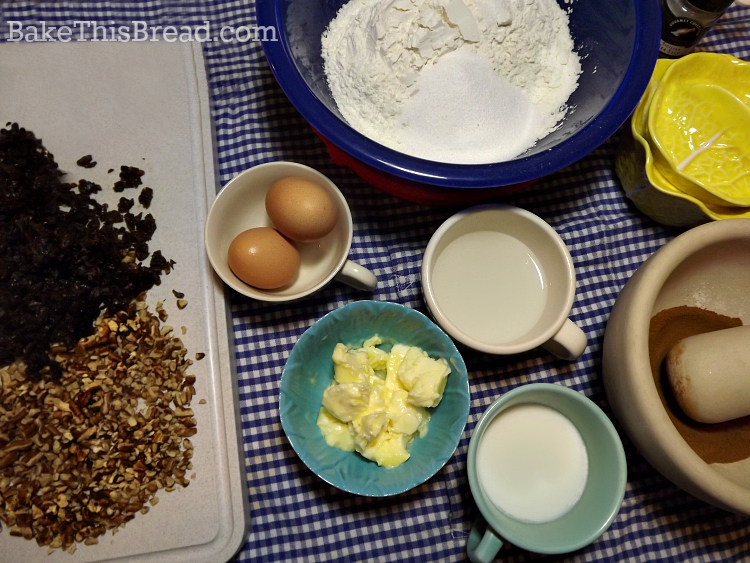
Ingredients for Homemade Cinnamon Breakfast Bread:
1/3 cup warm milk (2% is fine)
1 Tablespoon rapid rise dry yeast
3 cups bread flour (I used unbleached, substitute all-purpose flour)
5 Tablespoons granulated sugar
2 large eggs
1/4 teaspoon salt
3 Tablespoons fine quality fine quality cinnamon (or finely ground cinnamon chip bark using a mortar and pestle)
6 Tablespoons room temperature unsalted butter (about 1/3 cup or about 2/3 of a cube)
1/3 cup warm water
1 cup chopped raisins
1/2 cup chopped nuts (I used pecans)
2 teaspoons unsalted butter (to spread on top of hot bread crust after baking)
Cinnamon Swirl Filing:
3 Tablespoons softened unsalted butter
3 Tablespoons cinnamon
3 Tablespoons granulated sugar
Directions for Homemade Cinnamon Swirl Bread:
Okay, let’s bake this bread, shall we? It’s going to be an awesome kitchen DIY project! And I do hope you’ll share your baking experience with us…like how long it took for your bread to rise to the top of the pan so we can get a feel for how that’s working.
I’m going to show you each simple step to:
#mixitkneaditriseitswirlitriseitbakeittoastiteatit
Prep the pan!
Use unsalted butter or cooking spray to grease the bottom-only of a 9″ bread pan.
Pan Prep Tip: You can rub the end of a butter cube on the bottom of the pan or use a pastry brush or paper towel to spread it, or just spray the bottom with cooking spray.
Dissolve the yeast!
In a small bowl or cup, mix until incorporated (and check for a little bubbling action):
1/3 cup warm milk (we used 2%)
1 Tablespoon dry rapid rise yeast
Yeast Proofing Tip: If you’re sure of your yeast, then no need for this advance “proofing” step and you can just add the warm milk and yeast right into the main ingredients bowl (that’s what I do).
 Prep the raisins and nuts!
Using a large, sharp flat-blade knife, chop to a somewhat fine chop:
1 cup raisins
1/2 cup nuts (I used pecans)

Chop Tip: Chopping the raisins and nuts makes the best texture for this bread and ensures that they spread better throughout the dough. No need to be precise; a rough chop works fine.

Mix it!
In a large mixing bowl, use a Danish bread whisk or a wooden spoon to thoroughly incorporate:
3 cups bread flour
5 Tablespoons granulated sugar (3 Tablespoons for a less sweet bread)
2 large eggs
1/4 teaspoon salt
1/3 cup (6 Tablespoons) room temperature unsalted butter
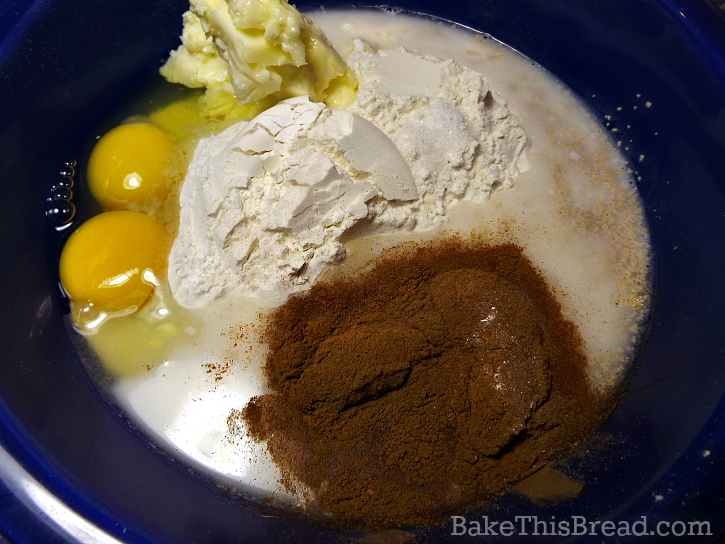
Mix Tip: Using a heavy whisk or wooden spoon for the first stir alows the flour to coat the wet ingredients to prevent super stickiness on your hands and countertop.

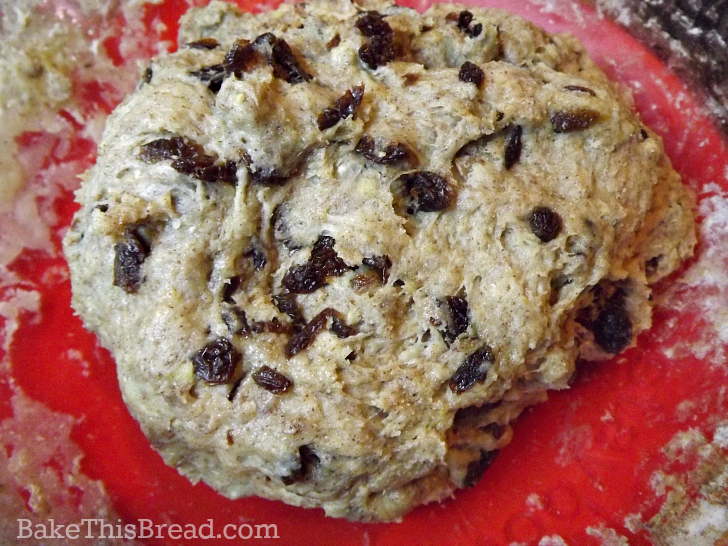
Add in the chopped raisins and nuts on top of the dough and work them into the dough using the tips of your fingers (aka finger kneading) for about 30 seconds until this initial dough is thoroughly blended with:
the prepared raisins
the prepared nuts
Nuts and Raisins: This photo seems to show just raisins being added but add the nuts at the same time.

The dough will look like this after you’ve worked the raisins and nuts into the dough at this initial stage.
Knead it!
Using your fastidiously clean hands and a squeaky clean countertop, set your oven timer or smart phone timer to 8 minutes and knead the dough on the counter for 8 minutes until it is fairly smooth.
Kneading Tip: If your dough feels super sticky you may knead it first in your hands by just smooshing it then pulling and twisting until it becomes less sticky and then completing the kneading with the heel of your hands on the countertop at the point when it doesn’t stick to the counter. If the dough is super-super sticky you can dust it with a little extra flour.
Another Kneading Tip: Use the heel of your hand to firmly press the dough on the countertop then fold the dough over itself and repeat with firm pressure (like, get your hidden aggression out).
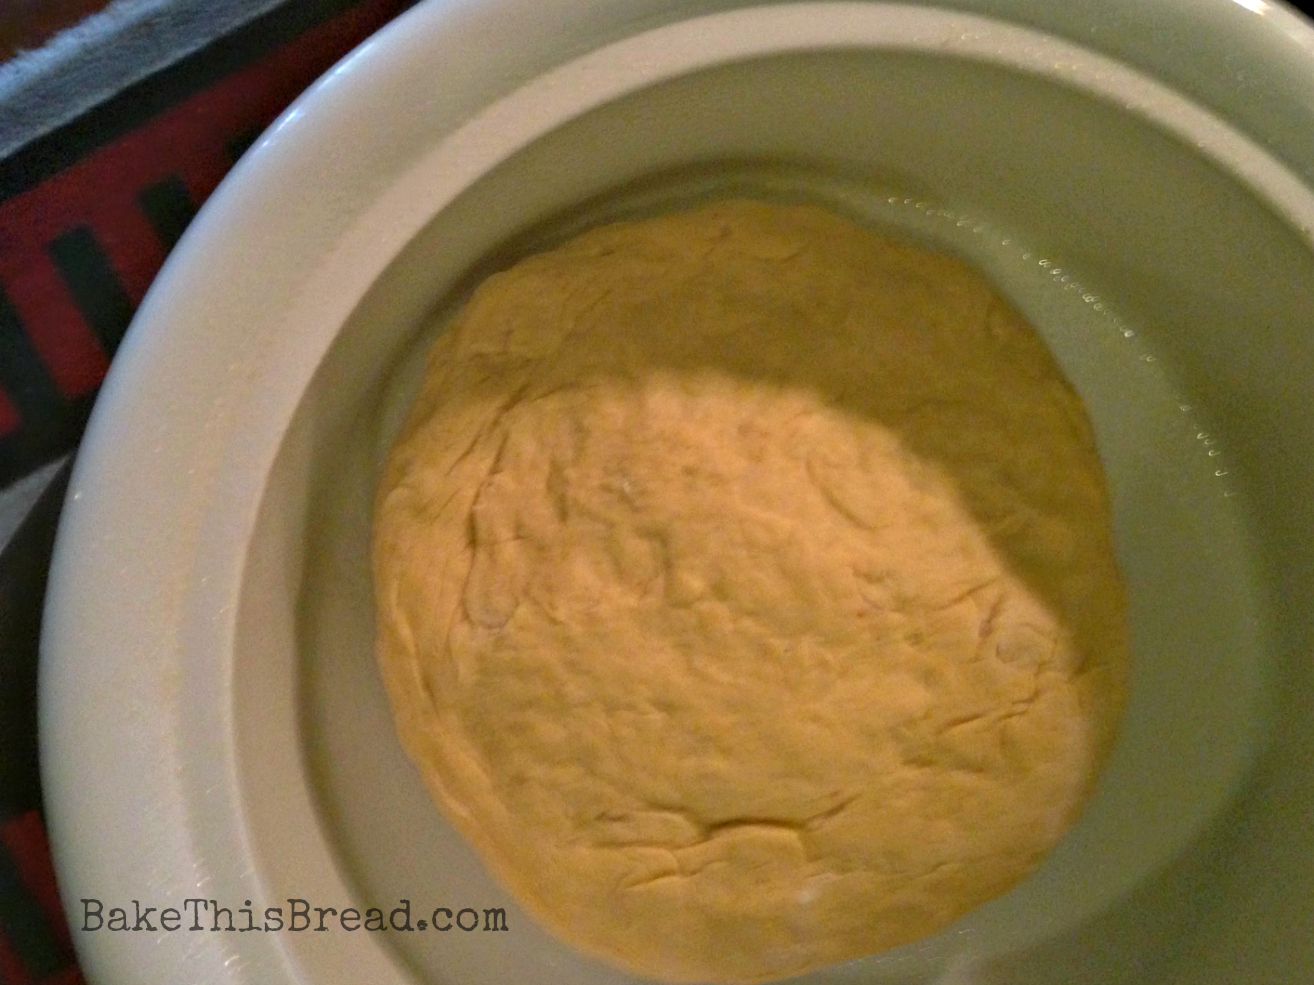
Super Special Bread Dough Tip: When the dough is completely kneaded, cup your hands around the sides of the dough and drag it on the counter towards you a couple of times to tighten the dough into a soft ball. The dough ball will spin slightly and the globe shape will tighten up so that it will have a better rise.

Rise it!
Place the round dough ball in a bowl and cover it with a clean towel to rise in a warm place for about 1 hour.
Warm Rising Spot Tip: I like to use the oven with no heat and just a light bulb lit inside the oven to make a nice, warm environment. Second choice is on top of the refrigerator away from pets and away from a cool breeze.

Swirl it!
Roll the soft dough gently on the counter into the a rectangle shape with the width about as long as the bread pan you’ll be using and the length a little longer by about one-third.
Tip: This is a buttery dough so it will spread and shape quite easily. If you don’t have a rolling-pin handy, you can use the bottom of a cookie pan to flatten the dough and then use your hands to form a rectangle shape.

Prepare the swirl by using a pastry brush to cover the dough with:
3 Tablespoons softened unsalted butter
Sprinkle it with:
3 Tablespoons cinnamon
Sprinkle it with:
3 Tablespoons granulated sugar
Roll-out shape: Just a fat rectangle will do it. My roll-out shape is about 9″ wide x 15″ tall.

Use a bench scraper (or a knife) if needed to start a roll going and gently roll ‘er up. Pinch the closing seam lightly with your fingers and keep the seam side down.

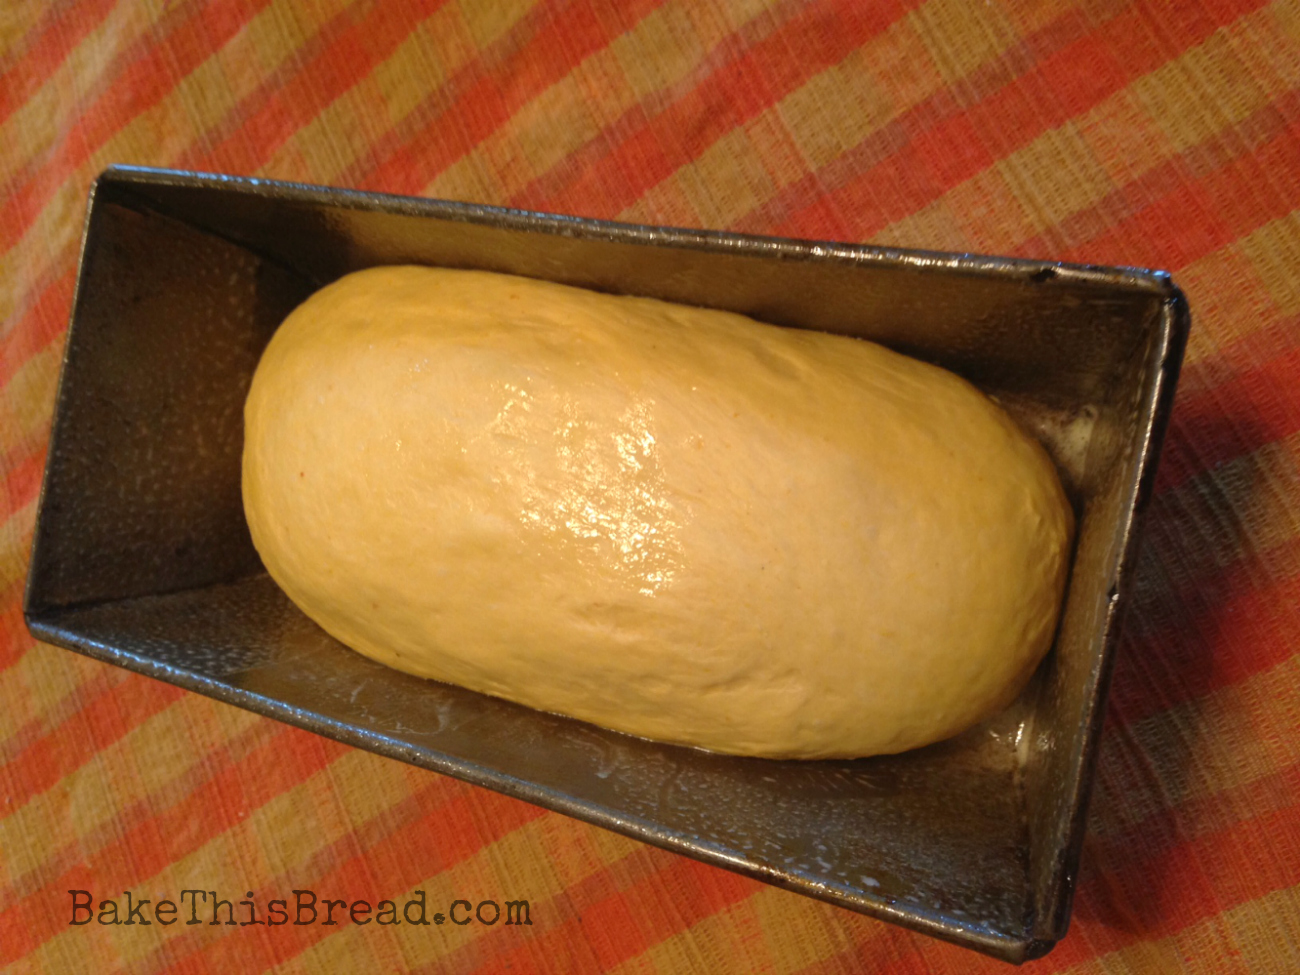
Rise it (again)!
Make sure the roll of dough is about the proper size for your baking pan. You may have to slightly adjust the shape at this point.
Smooth-ish Dough Tip: It is important the final dough as smooth as possible, especially the top portions, to help it rise higher.
Gently place the rolled dough in the center of a prepared baking pan.
The dough roll should almost touch or actually touch the ends of the pans but it need not touch the sides of the pan because it will grow.
Pinch the ends closed and then tuck them under at the ends of the pan.

Let it rise uncovered for the second rise for at least 1 hour or until the dough has risen to the top edge of the bread pan, spraying it or sprinkling it with a little water a couple of times during this second rising session. It will look like this when the dough has fully risen to the height of the baking pan. It may take an extra hour or so to rise to the height of the pan so please be patient with your dough while it grows.
Rising Tip: Be sure to let it rise right to the top of the bread pan because when it bakes it won’t rise much more.

Bake it!
Bake it on the center rack at 350 degrees for about 40 to 50 minutes, though your time may vary, so I suggest checking on it after 30 minutes until the internal temperature is about 185 degrees.
Crust Color Tip: This bread tends get quite dark on top so I suggest tenting the top of the baking bread with aluminum foil or parchment paper after 30 minutes to keep it from getting super dark on top.
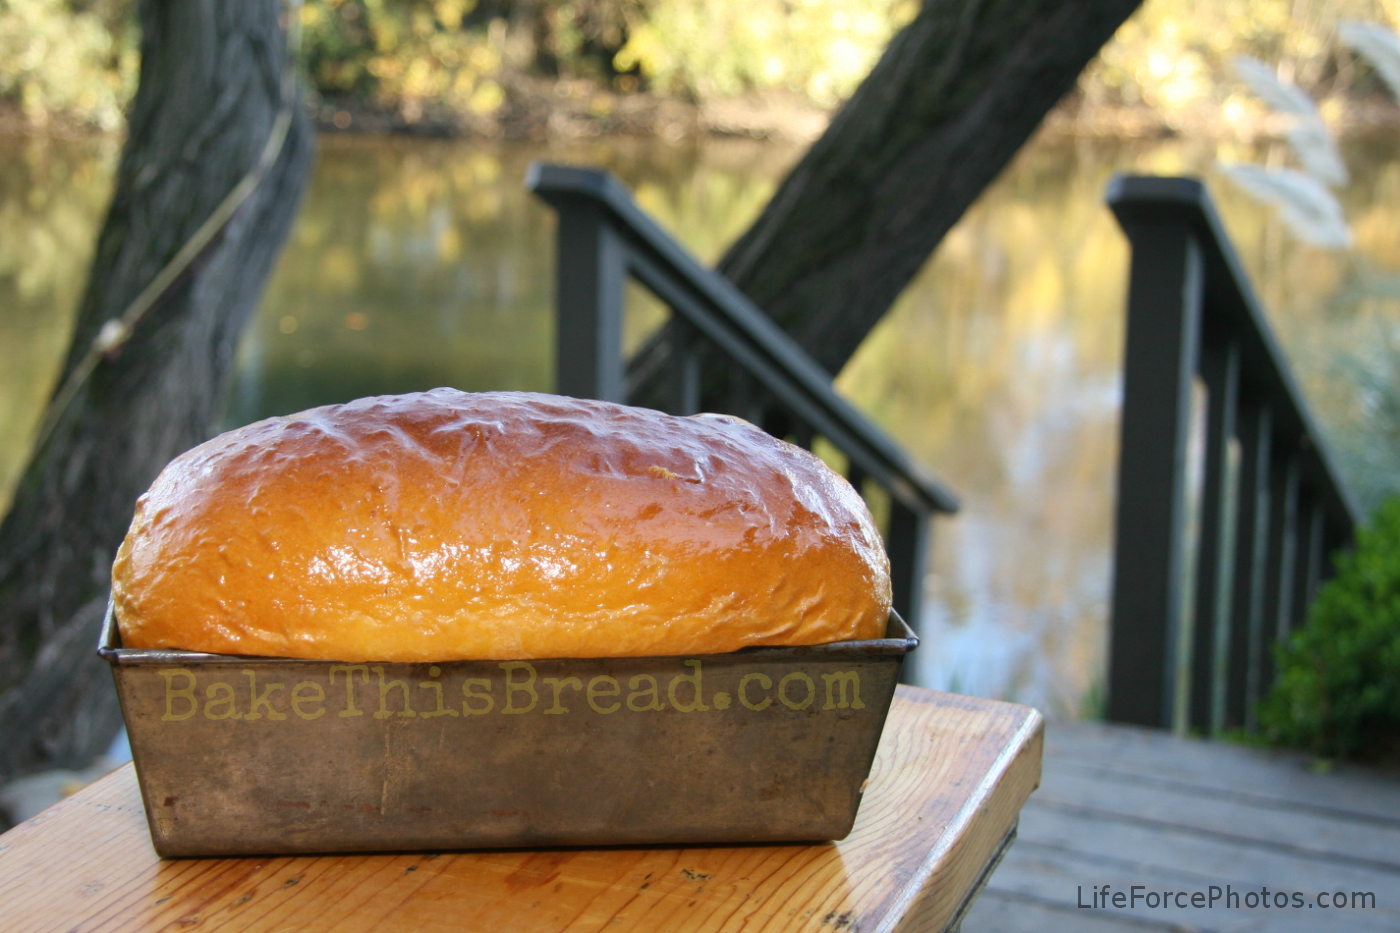
When it is fully baked and hot from the oven, lightly baste the top of the dough with a gentle spread of unsalted butter (about 2 teaspoons) and then slide it out from the pan to cool on a rack to prevent moisture build up.
Let cool for 15 minutes before slicing to ensure a perfect cut.
Store the bread in a paper bag or just covered in cloth for the first few hours. Thereafter, place the loaf in a plastic storage bag (I like green vegetable bags from the market for this purpose). If you intend to hold it for longer than 3 days, refrigerate it to help keep it longer (perhaps as long as 7 days refrigerated if you will be toasting it for serving).

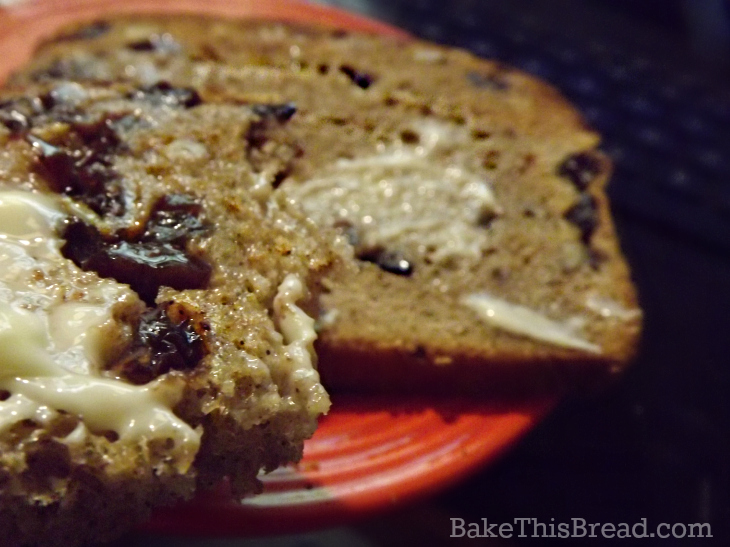
Toast it!
The flavor of the cinnamon really comes out when this bread is toasted. Honey butter is fun to serve on this toast, oh yum!
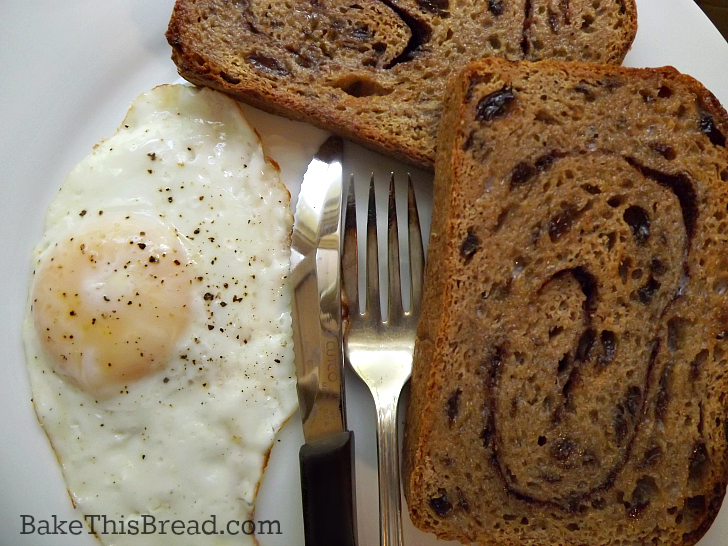
Eat it!
Serve it with great morning coffee and fresh-squeezed orange juice and the like and you’ve got some morning paradise on your hands. You may even attract a crowd with the aromas you’ll be creating in your kitchen.
Congratulations! You did this thing. And I know how you’re gonna feel when you sink your smile into your homemade awesomeness! Like this…

Thank you for joining me on this homemade bread baking adventure! I do hope you’re with us on bakethiscake.com (we’ve got charming and historic cakes for you to bake) and Instagram for day to day adventures.
Best,
Leslie


You may also enjoy reading:
Grandma Bessie’s Savory Cheese Crackers (bakethisbread.com)
Easy Yeasted German Coffee Cake (bakethiscake.com)
Dark Bananas Banana Bread (bakethisbread.com)
Betty’s Old-fashioned Banana Layer Cake (bakethiscake.com)